
Can I sharpen a table saw blade at home? Yes, you absolutely can sharpen a table saw blade at home, and learning how to do it properly will save you money and improve your cutting results.
A sharp table saw blade is more than just a convenience; it’s a necessity for clean cuts, efficient work, and safety. A dull blade forces the wood away from the cut line, leading to tear-out, splintering, and potentially dangerous kickback. It also puts more strain on your saw motor, reducing its lifespan. This comprehensive guide will walk you through the ins and outs of DIY table saw blade sharpening, whether you’re looking for a simple manual table saw blade sharpening method or are ready to invest in specialized tools. We’ll cover everything from basic maintenance to the nuances of carbide blade sharpening and when professional table saw blade sharpening might be the better choice.
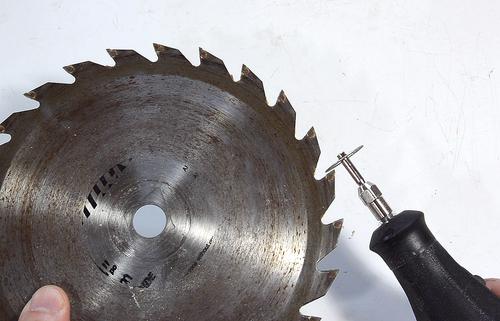
Image Source: woodgears.ca
Why Sharpen Your Table Saw Blades?
Think of your table saw blade like the tires on your car. When they’re worn down, they don’t grip the road well, leading to poor performance and increased risk. The same applies to your saw blades.
Benefits of a Sharp Blade:
- Cleaner Cuts: Sharp teeth slice through wood fibers cleanly, eliminating tear-out and splintering. This is especially crucial for hardwoods and veneered plywood.
- Reduced Kickback Risk: A sharp blade glides through the wood more easily, significantly reducing the chance of the wood binding and being violently thrown back at you.
- Less Strain on Your Saw: A dull blade requires more force to push through the material, making your saw motor work harder and potentially leading to overheating and premature wear.
- Improved Efficiency: Sharp blades cut faster and with less effort, saving you time and energy.
- Extended Blade Life: Regular sharpening can extend the usable life of your blades, delaying the need for costly replacements.
When to Sharpen Your Table Saw Blades
The frequency of sharpening depends on several factors:
- Type of Wood You Cut: Softwoods dull blades slower than hardwoods.
- Frequency of Use: The more you use your saw, the more often you’ll need to sharpen.
- Material Types: Cutting abrasive materials like MDF or particle board will dull blades much faster.
- Cut Quality: If you notice your cuts are becoming rough, splintered, or you have to force the wood through the blade, it’s time for sharpening.
A good rule of thumb is to inspect your blades regularly. If you’re cutting a lot, consider sharpening after every few hours of actual cutting time or when you first notice a decline in cut quality.
Methods for Sharpening Table Saw Blades
There are a few primary ways to approach sharpening saw blades at home:
1. Manual Table Saw Blade Sharpening
This method is the most accessible and can be done with simple tools. It’s best suited for blades that aren’t severely damaged or extremely dull.
Tools You’ll Need:
- A Bench Vise: To securely hold the blade.
- A Sharpening File: A high-quality metal file, often a triangular or mill file. The size and type of file depend on the size and tooth count of your blade. For most carbide-tipped blades, a fine-grit diamond file or a small, specialized carbide file is ideal.
- A Blade Holder or Jig (Optional but Recommended): Some people create simple wooden jigs to hold the blade at a consistent angle.
- Safety Glasses: Always protect your eyes.
- Gloves: To protect your hands and keep the blade clean.
- Rubbing Alcohol or Degreaser: To clean the blade before and after sharpening.
- Marker: To mark the first tooth you sharpen, so you know when you’ve completed a full rotation.
Steps for Manual Sharpening:
- Safety First: Ensure your table saw is unplugged. Wear safety glasses and gloves.
- Remove and Clean the Blade: Carefully remove the blade from your table saw. Clean off any sawdust, pitch, or resin using rubbing alcohol and a clean rag.
- Secure the Blade: Mount the blade securely in a vise. It’s best to clamp it by the steel body, not the carbide teeth. You want the teeth facing upwards so you can easily access them.
- Identify the Correct Angle: Most saw blades have a specific bevel angle on the face of each tooth. This angle is critical for a good cut. Look at your blade for clues – often, there’s a factory bevel. You can also research the recommended angle for your type of blade (e.g., crosscut, rip cut). A common bevel angle for general-purpose blades is around 15-20 degrees.
- Start Filing:
- Place the file on the face of a tooth, maintaining the correct bevel angle.
- Use smooth, consistent strokes, filing from the gullet (the space between teeth) towards the tip of the tooth.
- Apply firm pressure on the forward stroke and lift the file on the backstroke to prevent dulling the file or damaging the tooth.
- File each tooth the same number of strokes.
- Mark the first tooth you sharpened with a marker.
- Rotate and Repeat: Continue filing each tooth, working your way around the blade. Make sure to file each tooth with the same number of strokes and at the same angle.
- Sharpen the Gullets (Optional but Beneficial): Some people also lightly file the gullets to create a more aggressive hook angle, which can improve chip removal, especially for rip cuts. Be careful not to overdo this, as it can weaken the tooth.
- Check for Consistency: Once you’ve completed a full rotation, inspect each tooth. They should all look similar in shape and bevel.
- Clean Again: Remove any metal filings with a clean cloth and rubbing alcohol.
- Reinstall: Carefully reinstall the blade on your table saw.
Pros of Manual Sharpening:
- Low cost of entry.
- Can be done anywhere with basic tools.
- Good for touch-ups and light sharpening.
Cons of Manual Sharpening:
- Can be time-consuming.
- Difficult to maintain consistent angles, especially for beginners.
- May not be effective for heavily damaged or extremely dull blades.
- Can easily remove too much material if not careful.
2. Using a Table Saw Blade Sharpening Jig
A table saw blade sharpening jig is designed to hold your blade and guide your file or grinding wheel at the correct angle, making the process much more precise and repeatable.
Types of Jigs:
- Vise-Mounted Jigs: These attach to your bench vise and often have an adjustable arm to hold the file or grinding bit.
- Blade-Mounted Jigs: These clamp directly onto the blade itself and rotate with it, providing a stable platform for the file.
How a Jig Improves Sharpening:
- Angle Consistency: The jig ensures that each tooth is filed at the same bevel angle.
- Tooth-to-Tooth Uniformity: By maintaining consistent angles and stroke length, you ensure all teeth are sharpened equally.
- Reduced Effort: The jig does the work of holding the blade and guiding the tool, making the process less physically demanding.
Steps Using a Jig (General Guide – follow jig-specific instructions):
- Assemble and Mount the Jig: Set up your jig according to its manufacturer’s instructions.
- Secure the Blade: Place the blade onto the jig’s spindle or mounting system. Ensure it’s held firmly.
- Set the Angle: Adjust the jig to the correct bevel angle for your blade. This is the most crucial step. Refer to your blade’s specifications or general guidelines.
- Attach Your File/Grinding Bit: Secure the file or appropriate grinding bit (e.g., a small diamond wheel or a carbide burr) into the jig’s holder.
- Sharpen Each Tooth: Follow the jig’s mechanism to move the file across the face of each tooth, maintaining contact with the bevel. File each tooth with consistent pressure and number of strokes.
- Rotate and Repeat: Continue around the blade, ensuring consistent sharpening for every tooth.
- Clean and Reinstall: Once done, clean the blade and reinstall it on your saw.
Pros of Using a Jig:
- Greatly improves accuracy and consistency.
- Makes the process faster and less tedious than purely manual methods.
- Helps preserve the blade’s original tooth geometry.
Cons of Using a Jig:
- Requires an initial investment for the jig.
- Still requires practice to achieve perfect results.
3. Using Power Tools (e.g., Rotary Tools or Bench Grinders)
This is where carbide blade sharpening becomes more advanced, often requiring specialized attachments for rotary tools or careful technique with bench grinders.
Rotary Tool Sharpening:
- Tools: A quality rotary tool (like a Dremel) with a small diamond grinding wheel or a specific carbide grinding bit, a fine-tune speed control, and a table saw blade sharpening jig designed for rotary tools.
- Process: Similar to using a manual file with a jig, but the rotating grinding wheel does the work. It’s essential to use a slow speed to avoid overheating the carbide and damaging the bond with the steel. Maintain the correct angle and apply light, consistent pressure.
Bench Grinder Sharpening:
- Tools: A bench grinder with a fine-grit grinding wheel (often aluminum oxide), a grinding jig or vise, and cooling fluid (like water or soluble oil).
- Process: This is a more aggressive method and is best left to those with experience.
- Setup: Mount a fine-grit wheel. Use a jig or a steady rest to hold the blade at the correct bevel angle.
- Cooling: Keep the blade cool by frequently dipping it in water. Overheating will ruin the temper of the steel and can also damage the carbide.
- Grind: Move the blade against the spinning wheel, maintaining the angle. Grind each tooth briefly, then rotate to the next.
- Check: Periodically check the tooth shape and compare it to an unsharpened tooth or a reference.
- Honing: After grinding, it’s usually necessary to hone the teeth with a fine stone or diamond file.
Important Considerations for Power Tool Sharpening:
- Overheating: This is the biggest risk. Overheated carbide loses its hardness, and the steel can warp. Always use cooling methods and grind for short durations.
- Angle Control: Power tools can quickly remove too much material or alter the tooth geometry if the angle is not precisely controlled.
- Carbide vs. Steel: You are primarily sharpening the carbide tip. The steel body should only be lightly touched.
Pros of Power Tool Sharpening:
- Can be very fast.
- Effective for restoring severely damaged teeth if done correctly.
Cons of Power Tool Sharpening:
- High risk of damage due to overheating or incorrect angles.
- Requires specialized jigs and knowledge.
- Can be difficult to achieve a fine, sharp edge without subsequent honing.
- Generally not recommended for beginners.
Sharpening Table Saw Teeth: The Nuances
Each tooth on your table saw blade has a specific geometry that dictates its cutting performance. For effective sharpening, you need to consider:
Tooth Face (Bevel)
This is the primary surface you’ll be filing or grinding. The angle of this bevel affects how the blade cuts.
- Rip Blades: Have a lower hook angle (around 5-15 degrees) for aggressive removal of material in the direction of the grain.
- Crosscut Blades: Have a higher hook angle (around 15-25 degrees) for cleaner cuts across the grain.
- Combination Blades: Have a mix of tooth types and angles to handle both rip and crosscuts.
When sharpening, you aim to restore this original bevel angle.
Gullet (Tooth Space)
The gullet is the space between the teeth. Its shape and depth affect chip removal.
- Filing Gullets: Some sharpening methods involve lightly filing the gullets to reset the tooth shape or slightly alter the hook angle. This is more advanced and should be done with caution to avoid weakening the teeth or creating an overly aggressive cut that can lead to tear-out.
Tooth Set
This refers to the outward bend of the teeth, alternating left and right. The set creates a kerf wider than the blade body, preventing the blade from binding in the wood.
- Sharpening and Set: Standard sharpening methods (filing or grinding the face) do not alter the tooth set. If teeth are bent or damaged, they may need to be straightened or reset by a professional, or the blade might be beyond repair.
When to Consider Professional Table Saw Blade Sharpening
While DIY table saw blade sharpening is rewarding, there are times when it’s best to send your blades to the experts.
Reasons to Use Professional Sharpening Services:
- Severely Damaged Blades: If teeth are chipped, missing, or significantly bent, a professional has the equipment to repair or replace them.
- Lack of Time or Equipment: If you don’t have the time, patience, or the right tools for DIY sharpening, a service can save you the hassle.
- High-End Blades: For very expensive or specialized blades, professional sharpening can ensure they are returned to their optimal cutting performance.
- Consistency is Paramount: Professionals use precise machinery to ensure every tooth is sharpened to exact specifications, which can be hard to replicate at home.
- Safety Assurance: A properly sharpened blade by a professional is a guarantee of optimal safety performance.
What to Look for in Sharpening Services for Table Saw Blades:
- Expertise with Carbide: Ensure they specialize in sharpening carbide-tipped blades.
- Precision Equipment: They should use automated grinding machines that can precisely control angles and tooth geometry.
- Quality Control: Ask about their process for inspecting blades before and after sharpening.
- Turnaround Time: How long will it take to get your blades back?
- Cost: Compare pricing, but don’t let it be the sole deciding factor. Quality matters.
Many local saw shops or specialized sharpening businesses offer these services. Some companies also offer mail-in sharpening programs.
Maintaining Your Table Saw Blades Between Sharpenings
Proper maintenance can extend the life of your blades and keep them cutting well for longer.
Cleaning:
- Regularly clean blades with a good quality blade cleaner or a solution of mineral spirits or citrus-based degreaser. Remove pitch, resin, and sawdust. A clean blade cuts better and is less prone to overheating.
Storage:
- Store blades in their protective sleeves or in a dedicated blade storage case. This prevents teeth from getting damaged by contact with other objects.
Proper Use:
- Always use the correct blade for the type of cut.
- Ensure the blade is properly installed and the arbor nut is tightened securely.
- Never force the wood through the saw. If you feel resistance, stop and check your blade.
The Best Way to Sharpen Table Saw Blades: A Balanced Approach
The “best way” is subjective and depends on your needs, budget, and skill level.
- For the Beginner with Basic Needs: Manual sharpening with a good file and a simple jig is a great starting point. It’s cost-effective and teaches you the fundamentals.
- For the Serious Hobbyist or Woodworker: Investing in a quality table saw blade sharpening jig for use with a file or rotary tool offers a good balance of precision, cost, and control.
- For Professional Results or Heavily Used Blades: Professional sharpening services provide the highest level of precision and can handle more challenging restoration tasks.
Table Saw Blade Sharpening vs. Honing
It’s important to distinguish between sharpening and honing.
- Sharpening: This is the process of removing metal to create a new cutting edge by grinding or filing away dull or damaged material.
- Honing: This is the process of refining an existing edge, often with a fine stone or ceramic rod, to make it sharper without removing significant amounts of metal.
For table saw blades, especially carbide-tipped ones, we are primarily talking about sharpening table saw teeth. A final light honing with a very fine grit stone or diamond file after sharpening can improve the edge’s keenness, but it’s often secondary to the primary sharpening process.
Troubleshooting Common Sharpening Issues
- Inconsistent Cuts After Sharpening: This usually means the angles weren’t consistent across all teeth. Ensure your jig is set correctly or that your manual filing strokes are uniform.
- Blade Overheating: Too much pressure, too fast a grinding speed (with power tools), or not enough cooling can cause overheating.
- Teeth Chipping Quickly After Sharpening: This could be due to insufficient material removal during sharpening (the edge wasn’t truly renewed) or excessive heat applied during the process, which softens the carbide or the braze holding it.
- Blade Doesn’t Cut Cleaner: The bevel angle might be incorrect, or the gullets might be too shallow for the type of cut.
Frequently Asked Questions (FAQ)
Q1: How often should I sharpen my table saw blades?
A1: It depends on usage and the materials you cut. If you notice rough cuts, tear-out, or need to force material through, it’s time to sharpen. For heavy users, consider sharpening after every 10-20 hours of actual cutting.
Q2: Can I use a sharpening stone on my table saw blade?
A2: While it’s possible to use a fine grit sharpening stone or diamond plate for touch-up honing on very light dullness, it’s generally not efficient for true sharpening of carbide-tipped blades. Specialized files, grinding wheels, or professional services are usually required.
Q3: What is the best grit of file for sharpening table saw blades?
A3: For carbide-tipped blades, a fine-grit file (around 300-400 grit) or a dedicated carbide file is recommended. For steel blades, a coarser grit (around 150-250) might be used initially, followed by a finer grit. Diamond files are excellent for carbide.
Q4: How much material can I safely remove when sharpening?
A4: You want to remove as little material as possible while still creating a sharp edge. Over-sharpening removes too much material, reducing the tooth height and the number of times the blade can be resharpened. Aim to restore the existing bevel without significantly changing the tooth shape.
Q5: My table saw blade has damaged teeth. Can it be saved?
A5: If teeth are chipped or broken but the rest of the blade is sound, a professional sharpening service can often repair them. Severely bent teeth or missing teeth might render the blade irreparable, but a professional can assess this.
Q6: What’s the difference between a rip blade and a crosscut blade regarding sharpening?
A6: Rip blades typically have fewer teeth with a more aggressive hook angle (5-15 degrees) and are sharpened to maintain this aggressive angle for efficient wood removal along the grain. Crosscut blades have more teeth with a shallower hook angle (15-25 degrees) and are sharpened to maintain this for cleaner cuts across the grain.
Learning how to sharpen your table saw blades properly is an essential skill for any woodworker. It ensures safety, improves cut quality, and saves you money in the long run. Whether you opt for manual table saw blade sharpening, invest in a table saw blade sharpening jig, or utilize professional table saw blade sharpening services, keeping your blades sharp is key to successful woodworking.