
Can you sharpen a table saw blade yourself? Yes, you can sharpen a table saw blade yourself with the right tools and techniques, though it requires patience and precision. This guide will walk you through the process, offering DIY tips for effective table saw blade maintenance. Resharpening table saw blades can save you money and improve your woodworking results.
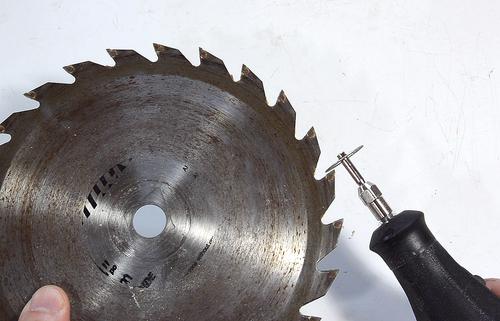
Image Source: woodgears.ca
Why Sharpen Your Table Saw Blade?
A dull table saw blade is more than just an inconvenience; it’s a safety hazard and a detriment to the quality of your work. When a blade loses its edge, it starts to rip and tear the wood rather than cleanly cut it. This leads to fuzzy edges, burn marks, and a general lack of precision.
Signs of a Dull Blade:
- Burning: Wood scorches easily, leaving black marks along the cut line.
- Rough Cuts: The surface of the wood is splintered or torn.
- Feeding Difficulty: You have to force the wood through the blade.
- Increased Noise: The saw sounds strained and makes a louder, rougher noise.
- Vibration: The blade vibrates excessively, affecting cut quality.
- Blade Wander: The blade doesn’t track straight, leading to inaccurate cuts.
Regularly inspecting and sharpening your table saw blades is a crucial part of table saw blade maintenance. While a blade sharpening service is an option, learning to do it yourself offers control, cost savings, and a deeper connection with your tools.
Assessing Your Table Saw Blade
Before you begin sharpening, it’s important to assess the condition of your table saw blade. Not all blades are candidates for DIY sharpening.
Blade Types and Sharpenability
Most carbide-tipped blades can be resharpened. The carbide tips are brazed onto the steel blade body. Over time, these tips can become dull or chipped. Blades that are severely damaged, have missing teeth, or have cracks should be replaced, not sharpened.
Inspecting the Teeth
Examine each tooth carefully. Look for:
- Dullness: The cutting edge appears rounded rather than sharp.
- Chipping: Small pieces of the carbide tip are missing.
- Gouges: Deeper damage to the carbide.
- Wear: The carbide tip has been significantly reduced in size.
- Brazing Issues: The carbide tip is loose or has separated from the steel body.
If you find significant damage like missing teeth or cracked carbide, it’s often more economical and safer to replace the blade. Minor dullness and small chips are usually fixable.
DIY Sharpening: What You’ll Need
Sharpening a table saw blade requires specific tools and a methodical approach. Investing in a quality sharpening jig can make a significant difference in the ease and accuracy of the process.
Essential Tools and Supplies
- Table Saw Blade Sharpening Jig: This is arguably the most important tool. A good jig holds the blade securely and guides the grinding wheel or stone at the correct angle.
- Grinding Wheel or Diamond File: For carbide-tipped blades, a fine-grit diamond wheel or a diamond file is ideal. Aluminum oxide or silicon carbide wheels can also be used, but diamond is generally preferred for carbide.
- Sharpening Stone: For very fine touch-ups or honing, a fine-grit sharpening stone can be useful.
- Magnification: A magnifying glass or loupe is helpful for inspecting the teeth closely.
- Safety Glasses: Always wear safety glasses to protect your eyes from metal dust and debris.
- Gloves: Protect your hands from sharp edges and dust.
- Blade Cleaner: To remove pitch, sap, and residue before sharpening.
- Cutting Fluid or Lubricant: Can help cool the blade and grinding surface, especially when using files.
- Calipers or Measuring Tool: To check tooth height and consistency.
- Bench Vice: To hold the blade securely if you’re not using a dedicated jig’s clamping system.
Choosing the Right Grinding Medium
- Diamond Wheels: These are excellent for carbide-tipped blades. They offer a consistent abrasive surface and don’t wear down quickly. Diamond files are a more affordable option for smaller jobs or touch-ups.
- Aluminum Oxide/Silicon Carbide Wheels: These are common grinding wheels. For sharpening carbide, use a fine grit (around 100-180 grit). These wheels can wear down faster and may require dressing to maintain a flat surface.
The Sharpening Process: Step-by-Step
Sharpening involves re-establishing the cutting edge on each tooth. The key is to maintain the original sharpening angle table saw blade.
Step 1: Cleaning the Blade
Before sharpening, thoroughly clean the blade. Use a blade cleaner, denatured alcohol, or a solvent to remove any pitch, wax, or debris that has accumulated on the teeth and gullets. A clean blade allows for better contact between the abrasive and the carbide.
Step 2: Securing the Blade
Mount the table saw blade securely in your sharpening jig. Ensure it’s held firmly without wobbling. If your jig doesn’t have a clamping mechanism, you might need to secure the blade in a bench vice using a cloth or wood scraps to prevent damage.
Step 3: Setting Up the Grinding Jig
Your sharpening jig is designed to guide the grinding wheel or file at the correct angle. Most jigs have adjustable mounts for the grinding tool and for positioning the blade.
Determining the Sharpening Angle:
The sharpening angle table saw blade is critical for its cutting performance. Most standard table saw blades have an 8-degree face angle (also known as the hook angle) for ripping and a 15-degree face angle for crosscutting. Some blades have a combination angle. Check your blade for markings, or consult the manufacturer’s specifications. If you’re unsure, a common compromise angle is around 10-15 degrees. The jig should allow you to set this angle precisely.
Step 4: Grinding the Teeth
This is the most delicate part. You want to grind away just enough material to restore a sharp edge without removing too much carbide.
- Start with One Tooth: Position the jig so the grinding wheel or file contacts the face of a single tooth.
- Gentle Pressure: Apply light, consistent pressure. Let the abrasive do the work.
- Grind the Bevel: Move the grinding wheel or file across the face of the tooth, following the existing bevel.
- One or Two Passes: For most dull blades, one or two light passes per tooth are sufficient. Over-grinding will reduce the lifespan of the blade.
- Index the Blade: After sharpening one tooth, advance the blade in the jig to the next tooth. Most jigs have a mechanism to ensure you move to the next tooth precisely. If not, you’ll need to manually rotate the blade, ensuring you align each tooth correctly.
- Consistency is Key: Aim for uniform grinding on all teeth. Check periodically with magnification to see the newly formed sharp edge.
Grinding Table Saw Teeth:
The goal is to re-establish the original bevel angle and create a sharp cutting edge. You are essentially removing the dull or slightly damaged layer of carbide.
Step 5: Sharpening the Gullets (Optional, but Recommended)
The gullet is the space between the teeth. Sharpening the gullets helps remove waste material more efficiently, especially for ripping blades.
- Use a Smaller Grinding Wheel or File: You may need a smaller diameter grinding wheel or a thinner file to access the gullets.
- Angle the Grind: The angle for sharpening the gullet is typically the clearance angle, which is usually around 15-20 degrees. This allows the gullet to properly clear sawdust and chips.
- Light Passes: Again, use light pressure and only a few passes.
Step 6: Hone the Edge (Optional)
After grinding, you can use a fine-grit sharpening stone or a honing rod to further refine the edge and remove any microscopic burrs. Drag the stone lightly across the face of each tooth at the same angle used for grinding.
Step 7: Balancing the Table Saw Blade
This step is crucial for smooth operation and preventing vibration. A well-balanced blade cuts cleaner and puts less strain on your saw’s motor.
- Why Balancing is Important: As teeth are ground down, they may not be removed uniformly, leading to an unbalanced blade.
- How to Check: Spin the blade gently. If one side consistently drops to the bottom, it’s heavier.
- Balancing Methods:
- Slight Grinding: Carefully grind a tiny amount of material from the heavier side of the tooth or the body of the blade (away from the cutting edge).
- Balancing Washers: Specialized balancing washers can be added to the arbor nut or collar. This is a more advanced technique.
- Professional Balancing: For critical applications or if DIY balancing proves difficult, professional balancing might be necessary.
Step 8: Final Inspection
Once you’ve finished sharpening and balancing, inspect the blade again with magnification. Ensure all teeth are sharp, the angles are consistent, and there are no visible defects.
DIY Sharpening for Specific Blade Types
While the general process remains the same, there are nuances for different types of table saw blades.
Sharpening Jig for Dado Blades
Dado blades have a different configuration, typically consisting of two outside cutters and several chippers.
- Individual Sharpening: Each component of a dado set needs to be sharpened individually.
- Chippers: The teeth on the chippers are usually ground at a different angle than the outside cutters. You’ll need to adjust your jig or approach accordingly.
- Angle Consistency: Maintaining the correct angle on all chippers and outside cutters is paramount for clean dado cuts.
- Using a Jig: A specialized jig designed for dado blades or adjustable jigs that can accommodate the different tooth configurations are essential.
Sharpening Stone for Table Saw Blades
A sharpening stone can be used for touch-ups or as a honing step.
- Fine Grit: Use a fine-grit stone (600 grit or higher).
- Angle Guide: Use an angle guide to maintain the correct sharpening angle.
- Lubrication: Use water or oil as recommended for your stone.
- Individual Tooth Honing: You’ll likely need to sharpen each tooth individually by hand, which can be time-consuming.
Maintaining Your Sharpened Blade
Proper care after sharpening will extend the life of your newly sharp blade.
Cleaning and Storage
- Clean Again: After sharpening, give the blade another light cleaning to remove any metal dust.
- Proper Storage: Store blades in a dry place, preferably in their original sleeves or a blade case to prevent damage and rust.
When to Replace, Not Resharpen
Even with diligent DIY sharpening, blades have a finite lifespan.
- Too Much Material Removed: If too much carbide has been ground away, the teeth may be too small to effectively cut or hold an edge.
- Cracked or Chipped Teeth: Severe damage to teeth often means the blade is beyond repair.
- Warped Blade: A blade that has warped cannot be straightened by sharpening.
- Too Many Sharpenings: Each sharpening removes material. Eventually, the carbide tips will be too small.
If you’re in doubt, it’s often safer to invest in a new blade. Consider a blade sharpening service if you’re dealing with severely damaged blades or want professional results.
The Cost-Benefit Analysis: DIY vs. Service
Deciding whether to sharpen yourself or use a blade sharpening service involves weighing costs, time, and quality.
DIY Sharpening Costs
- Initial Investment: A good sharpening jig can cost anywhere from $100 to $300+. Diamond wheels or files add to this.
- Consumables: Replacement grinding wheels or files.
- Time: Your personal time spent on the process.
Blade Sharpening Service Costs
- Per Blade Fee: Typically ranges from $5 to $20 per blade, depending on the type and condition.
- Turnaround Time: You’ll be without your blade while it’s being serviced.
- Quality Assurance: Professional services often have specialized equipment for precise angle grinding and balancing.
Table 1: Cost Comparison (Estimated)
| Factor | DIY Sharpening (Initial Cost) | DIY Sharpening (Per Blade) | Blade Sharpening Service (Per Blade) |
|---|---|---|---|
| Jig | $100 – $300+ | N/A | N/A |
| Grinding Medium | $30 – $100+ | N/A | N/A |
| Time | Your labor | Your labor | N/A |
| Blade Cleaner/Misc. | ~$20 | ~$5 | N/A |
| Total (First Blade) | $150 – $420+ | ||
| Cost per Additional Blade | ~$5 (for consumables) | $5 – $20 |
If you have several blades to maintain or frequently sharpen, the initial investment in a DIY setup can pay off over time. For occasional sharpening or if you value your time highly, a service might be more practical.
Frequently Asked Questions (FAQ)
Q: How often should I sharpen my table saw blade?
A: This depends on usage. For heavy use, sharpen every few months. For lighter use, once or twice a year might suffice. Look for the signs of a dull blade mentioned earlier.
Q: Can I use a bench grinder to sharpen my table saw blade?
A: While possible with extreme care and a specialized jig, a standard bench grinder is not ideal. They spin too fast, and it’s difficult to maintain the correct angles and avoid overheating the carbide. A dedicated sharpening jig and a slower speed grinder or file are much safer and more effective.
Q: What is the best sharpening angle for a table saw blade?
A: The ideal sharpening angle table saw blade depends on the type of cut. For ripping, a shallower face angle (around 8-10 degrees) is common. For crosscutting, a steeper angle (15-20 degrees) works better. Combination blades aim for a compromise. Always try to match the original angle.
Q: My blade still cuts rough after sharpening. What did I do wrong?
A: Common issues include:
* Uneven Grinding: Not sharpening each tooth consistently.
* Incorrect Angle: The sharpening angle was off.
* Not Honing: Micro-burrs were left on the edge.
* Blade Damage: The blade may have underlying damage not fixed by sharpening.
* Balancing Issues: An unbalanced blade can cause vibration and rough cuts.
Q: How do I know when a blade is too dull to resharpen?
A: If the carbide tips are severely worn down, have large chips, or if you can no longer achieve a sharp edge after a few passes, it’s time for a new blade.
Q: Can I sharpen a blade with missing teeth?
A: No, a blade with missing teeth should not be sharpened. It’s a safety hazard and cannot be effectively repaired by sharpening alone. It needs to be replaced.
Q: What’s the difference between grinding and honing?
A: Grinding removes dull or damaged material to re-establish a cutting edge. Honing refines that edge, removing microscopic burrs to make it even sharper.
By following these DIY tips for resharpening table saw blades, you can keep your tools in top condition, ensuring safer operation and cleaner cuts in your woodworking projects. Remember, patience and precision are your greatest allies in this process.