
Can I change a circuit breaker in my panel myself? Yes, with the right knowledge and precautions, you can safely change a circuit breaker in your electrical panel. This guide will walk you through the process of replacing a circuit breaker, from identifying a faulty breaker to the final steps of ensuring your electrical panel maintenance is up to par. We will cover everything you need to know for DIY circuit breaker replacement, ensuring your home electrical safety.
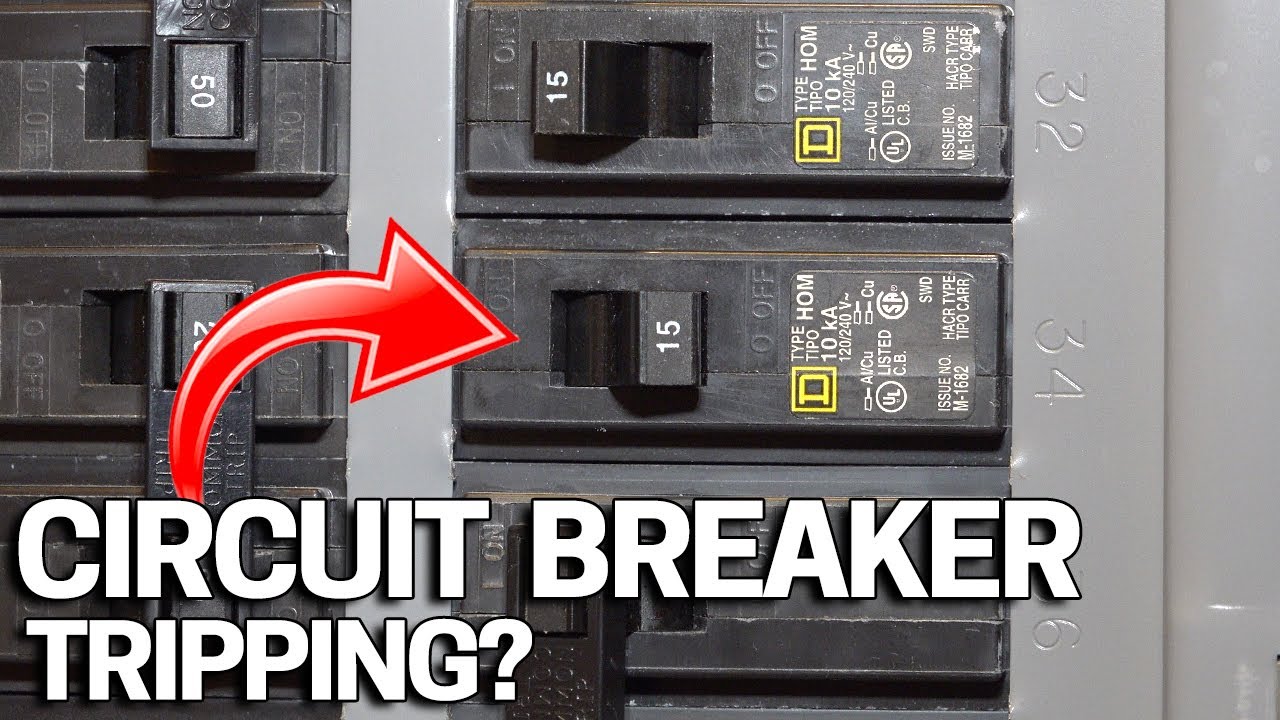
Image Source: i.ytimg.com
Deciphering Circuit Breakers: What They Are and Why They Matter
Circuit breakers are the unsung heroes of your home’s electrical system. They act as automatic safety switches that protect your electrical wiring and appliances from damage caused by electrical overloads or short circuits. When too much electricity flows through a circuit, the breaker “trips,” cutting off the power to prevent overheating and potential fires. Regularly checking your electrical panel and knowing how to reset circuit breaker is crucial for maintaining a safe home.
When to Consider a Circuit Breaker Replacement
Several signs indicate it might be time to replace tripped breaker or even the entire breaker itself:
- Frequent Tripping: If a breaker trips regularly, even with normal appliance usage, it might be failing.
- Discolored or Burnt Terminals: This is a clear sign of overheating and a potential hazard.
- Warm to the Touch: A breaker that feels unusually warm when no load is applied suggests an internal issue.
- Breaker Won’t Stay On: If you try to reset circuit breaker and it immediately trips again, it’s likely faulty.
- Visible Damage: Cracks, melting, or rust on the breaker housing warrant immediate attention.
Knowing how to identify faulty breaker is a key skill in electrical panel maintenance.
Safety First: Essential Precautions Before You Start
Working with electricity is inherently dangerous. Your safety and the safety of your home are paramount. Before you even think about touching your electrical panel, commit to these crucial safety steps:
1. De-Energize the Panel
This is the single most important step. You must turn off the main power to your entire house.
- Locate your main electrical panel. It’s usually in a basement, garage, utility room, or closet.
- Find the main breaker. This is typically the largest breaker, often at the top or side of the panel, and controls all the power in your home.
- Firmly push the main breaker to the “OFF” position.
- Crucially, verify the power is off. Use a non-contact voltage tester to check outlets and lights in various rooms. If the tester indicates power, the main breaker is not functioning correctly, or you haven’t fully switched it off. In this case, do not proceed and call a qualified electrician.
2. Gather Your Tools and Materials
Having the right tools ready will make the job smoother and safer:
- Replacement Circuit Breaker: Ensure it’s the correct amperage and type (single-pole, double-pole, GFCI, AFCI) for your panel. Match the brand if possible, as breakers are not always interchangeable between brands.
- Non-Contact Voltage Tester: Essential for confirming power is off.
- Insulated Screwdrivers: Phillips and flathead, with properly insulated handles.
- Wire Strippers/Cutters: For preparing wires if necessary.
- Needle-Nose Pliers: Helpful for manipulating wires.
- Work Gloves: Insulated gloves offer an extra layer of protection.
- Safety Glasses: Protect your eyes from dust or debris.
- Flashlight or Headlamp: To illuminate the panel interior.
- Ladder (if needed): Ensure it’s stable and placed on a level surface.
- Camera or Smartphone: To take pictures of the wiring before you disconnect anything. This is invaluable for remembering how it was connected.
3. Understand Your Panel
Familiarize yourself with your electrical panel. Note the brand, model, and the types of breakers installed. Some panels are more complex than others. If you’re unsure about any aspect, consult a professional. Electrical wiring safety is a broad topic, and your panel is a critical component.
Step-by-Step Guide to DIY Circuit Breaker Replacement
Once you’ve confirmed the power is off and gathered your tools, you’re ready to begin the DIY circuit breaker replacement.
Step 1: Open the Panel Cover
- Carefully open the main door of your electrical panel.
- You’ll see a metal cover (dead front) that conceals the breakers. Remove this cover. It’s usually held in place by several screws. Keep these screws in a safe place.
Step 2: Locate the Breaker to Be Replaced
- Refer to your panel’s labeling to pinpoint the specific breaker you need to replace. If the labeling is unclear, this is a good time to improve your electrical panel maintenance.
- Take a moment to assess the wiring connected to the breaker. Notice how the hot wire (usually black or red) connects to the breaker’s terminal screw and how the breaker snaps onto the busbar within the panel.
Step 3: Remove the Old Breaker
- Ensure the breaker is in the “OFF” position. Even though the main power is off, it’s good practice.
- Disconnect the wire: Use a screwdriver to loosen the terminal screw holding the hot wire to the breaker. Carefully pull the wire out.
- Remove the breaker from the busbar: Most breakers clip onto a metal rail called a busbar. To remove it, you’ll usually need to gently pry downwards or sideways on the breaker’s rear clip. Some breakers might have a small latch. You might need to wiggle it gently. Needle-nose pliers can be helpful here.
- Tip: Before disconnecting the wire, take a clear picture of the connection.
Step 4: Install the New Circuit Breaker
- Snap the new breaker onto the busbar: Align the busbar clip on the new breaker with the corresponding slot on the busbar. Push firmly until it snaps securely into place. Ensure it’s seated correctly and parallel to the other breakers.
- Connect the wire: Reconnect the hot wire to the terminal screw on the new breaker. Ensure the bare copper wire is inserted correctly and the screw is tightened firmly. Do not overtighten, as this can damage the wire or the breaker. If the wire looks damaged or corroded, it’s best to cut off the damaged section and strip a new, clean section of wire using your wire strippers. Refer to electrical wiring safety guidelines for proper wire preparation.
Step 5: Test the New Breaker (Before Closing)
- With the new breaker in the “OFF” position, flip the main breaker back to the “ON” position.
- Carefully switch the newly installed breaker to the “ON” position.
- Check if the associated circuit is now powered. If it is, proceed to the next step. If not, turn the main breaker off again and re-check your connections.
Step 6: Reassemble the Panel
- Once you’ve confirmed the new breaker is working correctly, turn the main breaker back to the “OFF” position.
- Carefully replace the metal dead front cover, ensuring no wires are pinched. Secure it with the screws you removed earlier.
- Close the main panel door.
Step 7: Restore Power and Test
- Turn the main breaker back to the “ON” position.
- Test the circuit controlled by the new breaker by plugging in an appliance or turning on a light.
- If everything works as expected, congratulations! You’ve successfully replaced a circuit breaker.
Advanced Considerations and Troubleshooting
When tackling DIY circuit breaker replacement, sometimes issues arise. Here are some common scenarios and how to approach them.
1. Identifying Faulty Breaker Issues
Sometimes, a breaker might appear fine but still cause problems. Circuit breaker troubleshooting involves more than just visual inspection.
- Intermittent Issues: If a breaker trips randomly, it could be a sign of a loose connection either at the breaker itself or at an outlet/switch on the circuit. It could also indicate the breaker is failing internally.
- Overheating without Tripping: As mentioned, a warm breaker is a concern. This often points to a poor connection, either where the wire attaches to the breaker or where the breaker attaches to the busbar.
2. Circuit Breaker Testing
While simply replacing a breaker is common, sometimes circuit breaker testing might be considered. However, performing in-depth circuit breaker testing typically requires specialized equipment and expertise that most DIYers do not possess. The most practical “test” for a DIYer is observing its behavior: Does it trip unnecessarily? Does it hold a load? Is it visibly damaged? If you suspect a breaker is faulty and it’s not obvious, replacement is often the safest route.
3. Amperage and Type of Breakers
It’s critical to use the correct replacement breaker.
- Amperage: Never replace a breaker with one of a higher amperage rating than the original. This can overload the wiring and cause a fire. Always match the amperage.
- Type:
- Single-Pole Breakers: Control 120-volt circuits (e.g., lights, standard outlets).
- Double-Pole Breakers: Control 240-volt circuits (e.g., electric dryers, water heaters, central air conditioning) and use two busbar slots.
- GFCI (Ground Fault Circuit Interrupter) Breakers: Provide protection against electric shock by detecting imbalances in current flow. Required in areas like kitchens, bathrooms, and outdoors.
- AFCI (Arc Fault Circuit Interrupter) Breakers: Protect against fires caused by arcing faults, which can occur in damaged wiring. Required in many living areas by modern codes.
Using the wrong type of breaker can be dangerous and may not provide the intended safety.
4. Busbar Compatibility
While most breakers look similar, they are designed to fit specific busbars within certain brands of electrical panels. Using a breaker from a different manufacturer, even if it physically fits, can lead to poor contact, overheating, and potential failure. Always try to use breakers specifically listed for your panel brand. You can often find a list of compatible breakers inside your electrical panel door or on the panel’s manufacturer plate.
5. Overloading Circuits
A common reason for a breaker tripping is simply drawing too much power from a single circuit. If you reset circuit breaker and it trips again when you turn on a specific appliance, the circuit might be overloaded. Consider distributing the load to other circuits or upgrading to a higher amperage circuit (which would require rewiring and a professional).
When to Call a Professional Electrician
While this guide aims to empower DIYers, there are situations where it’s best to call a qualified electrician:
- You are uncomfortable or unsure at any step.
- Your electrical panel is old or appears damaged.
- You cannot safely de-energize the panel.
- You don’t have the correct replacement breaker.
- The wiring in the panel looks old, brittle, or shows signs of damage.
- You encounter unexpected problems or resistance during removal or installation.
- Breakers continue to trip after replacement.
- You need to upgrade your panel or wiring.
Remember, home electrical safety is paramount. It’s better to pay for a professional than to risk injury or damage to your home.
Maintaining Your Electrical Panel: Beyond Breaker Replacement
Effective electrical panel maintenance goes beyond simply replacing faulty breakers. Regular checks can prevent issues before they become serious.
- Labeling: Ensure all breakers are clearly and accurately labeled. This makes troubleshooting much easier.
- Cleanliness: Keep the area around your electrical panel clean and free of clutter, especially flammable materials.
- Visual Inspection: Periodically (with the power off), open the panel and look for any signs of discoloration, corrosion, or loose connections on breakers and wiring.
- Test GFCI/AFCI: Regularly test GFCI and AFCI outlets and breakers according to manufacturer instructions.
Frequently Asked Questions (FAQ)
Q1: How do I know if I need to replace a circuit breaker?
A1: Signs include frequent tripping, discolored or burnt terminals, a breaker feeling warm to the touch, or a breaker that won’t stay on after being reset.
Q2: Can I replace a breaker with a higher amperage one?
A2: Absolutely not. Replacing a breaker with a higher amperage than the circuit wiring is rated for is extremely dangerous and can lead to fires. Always match the amperage.
Q3: What happens if I use a breaker from a different brand?
A3: While some breakers might physically fit, they are designed for specific panel brands. Using an incompatible breaker can result in poor electrical contact, overheating, and potential failure or fire hazards. It’s best to use breakers listed for your panel.
Q4: Is it safe to work on the electrical panel if I’m not a professional?
A4: It can be, but only if you take extreme precautions. The most critical step is to turn off the main power and verify it’s off using a voltage tester. If you are uncomfortable at any point, call a qualified electrician.
Q5: What is the difference between a GFCI and an AFCI breaker?
A5: A GFCI (Ground Fault Circuit Interrupter) breaker protects against electric shock by detecting current leakage to ground. An AFCI (Arc Fault Circuit Interrupter) breaker protects against fires caused by electrical arcs, which can occur in damaged wiring.
Q6: My breaker keeps tripping. What should I do?
A6: First, try to identify if a specific appliance is causing the overload. If not, the breaker itself might be faulty, or there could be an issue with the wiring on that circuit. A careful circuit breaker troubleshooting process is needed, potentially leading to replacement or calling a professional.
By following this guide, you can confidently and safely perform a DIY circuit breaker replacement as part of your essential electrical panel maintenance. Always prioritize home electrical safety and consult a professional if you have any doubts.