
Can you use a saw blade after it’s dirty? Yes, you can, but it’s not ideal. A dirty saw blade cuts less efficiently, can cause tear-out, and might even be a safety hazard. Keeping your saw blade clean is a vital part of saw blade maintenance and ensures better cuts and longer life for your tools.
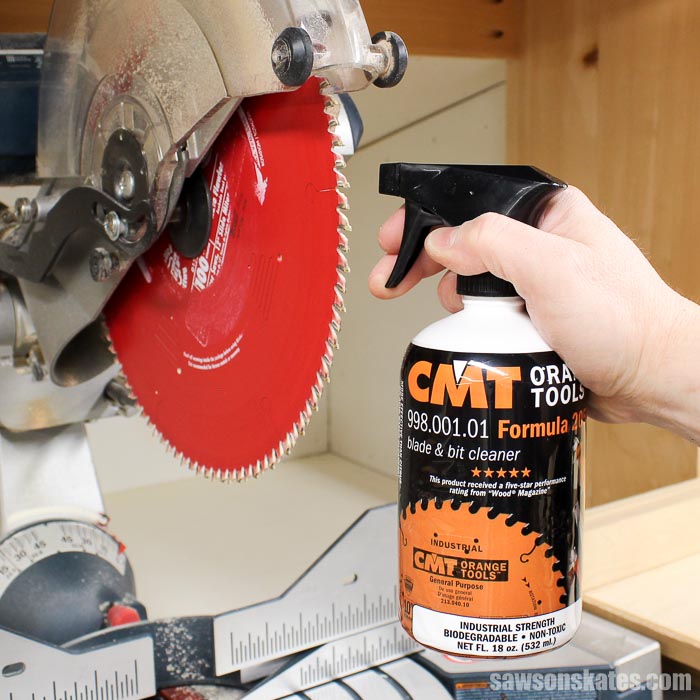
Image Source: sawsonskates.com
Why Cleaning Your Saw Blade Matters
A clean saw blade is a happy saw blade. Think of it like this: when you’re trying to do a task, and your tools are gunked up, it’s much harder, right? Your saw blades are no different. Over time, wood resins, sap, and metal shavings build up on the teeth and the blade body. This buildup doesn’t just look bad; it actively hinders performance.
- Reduced Cutting Efficiency: Sawdust and resin act like a gummy coating. This makes the blade work harder. Your power tool will struggle, using more energy.
- Poor Cut Quality: A blade clogged with debris can lead to rough cuts, splintering, and noticeable tear-out. This means more sanding and finishing work for you.
- Increased Heat: Friction from a dirty blade generates excess heat. This can warp the blade, dull the teeth faster, and even damage the workpiece.
- Safety Concerns: A blade that’s not cutting cleanly can bind in the material. This can cause kickback, a dangerous situation where the wood or blade is violently thrown back towards the operator.
- Accelerated Wear: Constant struggle against buildup leads to premature dulling of the teeth. This means you’ll need blade sharpening more often, or worse, need to replace the blade sooner.
Regular cleaning is a simple yet effective way to keep your blades performing at their best. It’s a core aspect of power tool blade care.
What Gets Your Saw Blade Dirty?
Several common culprits contribute to a dirty saw blade:
- Wood Resins and Sap: Most woods, especially softwoods like pine and fir, contain natural resins and sap. These sticky substances transfer to the blade as you cut.
- Adhesives: If you’re cutting plywood, MDF, or particleboard, glues and adhesives used in their manufacturing can build up on the blade.
- Metal Shavings: When cutting metal, fine metal particles can cling to the blade.
- Sawdust and Debris: Fine dust and larger chips can accumulate, especially in the gullets (the spaces between the teeth).
- Rust: If your blades are stored in a damp environment, rust can form, which is abrasive and hinders cutting. Removing rust from a saw blade is a specific, important task.
Cleaning Different Types of Saw Blades
While the general principles of cleaning apply to most saw blades, there are nuances depending on the type of saw.
Cleaning Table Saw Blades
Cleaning table saw blades is a common task for woodworkers. Table saw blades often accumulate a significant amount of resin and sawdust due to the nature of the cutting action.
Steps for Table Saw Blade Cleaning:
- Safety First: Always unplug the saw. Wear safety glasses and gloves.
- Blade Removal: Carefully remove the blade from the saw arbor. Consult your saw’s manual if you’re unsure how to do this. Use a wrench to loosen the arbor nut.
- Initial Debris Removal: Use a stiff brush (a brass brush works well) or compressed air to remove loose sawdust and debris from the teeth and blade body. Pay attention to the gullets.
- Soaking (for Heavy Buildup):
- Saw Blade Cleaner Solutions: Many commercial saw blade cleaner solutions are available. These are often citrus-based or solvent-based and very effective at dissolving resins.
- DIY Solutions: A common and effective DIY cleaner is a mixture of warm water and a degreaser like Simple Green, or even a strong dish soap. For tougher buildup, a solution of ammonia and water can be used, but ensure good ventilation and wear protection. Some also use oven cleaner, but test it on an inconspicuous area first as it can be harsh.
- Soaking Time: Submerge the blade in your chosen cleaner for 15-30 minutes, or longer for heavily soiled blades. Some recommend soaking overnight.
- Scrubbing: After soaking, use a brush (an old toothbrush or a dedicated cleaning brush) to scrub away loosened residue. This is where blade tooth cleaning is crucial. Ensure you get into the spaces between the teeth.
- Rinsing: Rinse the blade thoroughly with clean water.
- Drying: Dry the blade completely and immediately with a clean cloth. Any residual moisture can lead to rust.
- Lubrication (Optional but Recommended): Apply a light coat of WD-40 or a silicone-based spray to protect the blade from rust and make future cleaning easier. Wipe off any excess.
Circular Saw Blade Cleaning
Circular saw blade cleaning follows similar principles to table saw blades. The main difference is the size and often the frequency of use.
Steps for Circular Saw Blade Cleaning:
- Safety: Unplug the saw. Wear safety glasses and gloves.
- Blade Removal: Remove the blade from the circular saw. You’ll typically need an arbor wrench to hold the arbor while you loosen the nut.
- Dry Cleaning: Brush off loose dust and debris with a stiff brush or compressed air.
- Resin Removal:
- Commercial Cleaners: Use a saw blade cleaner solution designed for metal and resin removal.
- Solvent-Based Cleaners: Mineral spirits or denatured alcohol can also be effective. Apply them to a cloth and wipe down the blade.
- Hot Water and Degreaser: For less stubborn grime, a soak in hot water with a strong degreaser can work.
- Scrubbing: Use a brush to clean the teeth and blade body. Focus on blade tooth cleaning to ensure no residue remains.
- Rinsing and Drying: Rinse the blade with clean water and dry it thoroughly and immediately with a cloth.
- Rust Prevention: A light application of protective oil is a good idea.
Band Saw Blade Cleaning
Band saw blade cleaning is important for maintaining the smooth operation of your band saw. Band saw blades can get clogged with sawdust and resin, affecting their ability to track properly.
Steps for Band Saw Blade Cleaning:
- Safety: Ensure the band saw is unplugged. Wear gloves and eye protection.
- Blade Removal: Release the blade tension and carefully remove the band saw blade. Blades can be under tension, so handle them with care.
- Initial Cleanup: Brush off all loose debris. Compressed air is very useful here to blast sawdust from the teeth and gullets.
- Soaking: You can soak band saw blades in a cleaning solution similar to those for table saw blades. However, because they are often longer and more flexible, a shallow tray or even a wide gutter can be used to contain the solution.
- Scrubbing: Scrub the teeth and the blade body. Pay attention to the spaces between the teeth.
- Rinsing and Drying: Rinse thoroughly with water and dry completely with a cloth. Ensure no moisture is left.
- Inspection: While the blade is off, inspect it for any damaged teeth or signs of wear.
Other Blade Types (Jigsaw, Reciprocating Saw, Miter Saw)
The principles for power tool blade care extend to other blades as well.
- Jigsaw Blades: These smaller blades can be cleaned effectively by soaking them in a blade cleaner and then scrubbing them with a toothbrush.
- Reciprocating Saw Blades: Similar to jigsaw blades, resin and debris can build up. Soaking and scrubbing are effective. For blades used for metal cutting, use a cleaner appropriate for metal.
- Miter Saw Blades: These are often larger and heavier. The process is similar to cleaning table saw blades: removal, cleaning solution soak, scrubbing, rinsing, and drying.
Effective Saw Blade Cleaner Solutions
Choosing the right saw blade cleaner solution is key to effective cleaning.
Commercial Cleaners
These are readily available and formulated for specific tasks.
- Citrus-Based Cleaners: Excellent for dissolving wood resins and sap. They are generally less harsh than solvent-based cleaners.
- Solvent-Based Cleaners: Stronger and faster-acting, good for tough grime, adhesives, and even some metal residues. Examples include acetone, mineral spirits, and specialized blade cleaners. Always use in a well-ventilated area.
- Degreasers: All-purpose degreasers can be effective for general grime.
DIY Solutions
These are often cost-effective and readily available.
- Warm Water and Dish Soap/Degreaser: A good starting point for moderate buildup.
- Ammonia Solution: Mix ammonia with water (e.g., 1 part ammonia to 3 parts water). Excellent for tough resins. Caution: Use in a very well-ventilated area and wear gloves and eye protection. Never mix ammonia with bleach, as this creates toxic fumes.
- Oven Cleaner: Some people have success with oven cleaner, as it’s designed to break down baked-on grease and grime. However, it can be very aggressive. Test it on a small area of the blade first and rinse thoroughly.
- Vinegar: White vinegar can help break down some residues and is also useful for removing rust from a saw blade.
Table: Saw Blade Cleaning Solutions Comparison
| Solution Type | Best For | Pros | Cons | Safety Precautions |
|---|---|---|---|---|
| Citrus-Based Cleaners | Wood resins, sap, general grime | Effective, pleasant scent, often biodegradable | Can be slower on very heavy buildup | Follow product instructions. Good ventilation recommended. |
| Solvent-Based Cleaners | Tough resins, adhesives, tar, glue | Fast-acting, strong cleaning power | Strong fumes, can be flammable, may require more protection | Essential: Wear respirator, gloves, eye protection. Use in a well-ventilated area, away from ignition sources. |
| Degreasers (e.g., Simple Green) | Grease, oil, moderate grime | Versatile, often biodegradable, less harsh than solvents | May not be strong enough for very stubborn resin buildup | Follow product instructions. Good ventilation. |
| Ammonia Solution | Stubborn resins, dried sap | Very effective for tough organic buildup | Strong fumes, requires good ventilation, can be corrosive | Essential: Wear respirator, gloves, eye protection. Use in a well-ventilated area. NEVER mix with bleach. |
| White Vinegar | Light rust, mild buildup | Natural, mild acid, can help with rust | Less effective on heavy resin, smell can be strong | Generally safe, but good ventilation is always wise. |
| Oven Cleaner | Baked-on grime, very tough residue | Extremely powerful for breaking down tough deposits | Very harsh, can damage blade coating or metal if left too long, strong fumes | Essential: Wear heavy-duty gloves, respirator, eye protection. Use in a very well-ventilated area. Rinse VERY thoroughly. |
Removing Rust from a Saw Blade
Rust is a common problem, especially in humid environments or if blades are not dried properly after cleaning. Removing rust from a saw blade is crucial for performance and to prevent further damage.
Methods for Rust Removal:
- Vinegar Soak: Submerge the rusted blade in white vinegar for several hours or overnight. The acetic acid in vinegar helps to dissolve rust. After soaking, scrub the rust off with a wire brush or steel wool. Rinse and dry thoroughly.
- Baking Soda Paste: Make a thick paste of baking soda and water. Apply it to the rusted areas and let it sit for an hour or two. Scrub with a stiff brush or steel wool. Rinse and dry completely.
- Commercial Rust Removers: Specialized rust removal products are available and can be very effective. Always follow the manufacturer’s instructions carefully.
- Fine Steel Wool/Brass Brush: For light surface rust, you might be able to scrub it off with fine steel wool (0000 grade is best) or a brass brush, sometimes with a bit of lubricant like WD-40.
After removing rust, it’s vital to clean the blade of any residue from the rust remover and then dry it thoroughly. Applying a light protective coating of oil is highly recommended to prevent future rust.
The Art of Deburring a Saw Blade
Deburring saw blade teeth is a part of maintaining sharp edges. While cleaning removes buildup, deburring addresses microscopic imperfections. This is usually a task for professional sharpening, but if you notice a burr, it means the blade is dull and needs attention. A burr is a rough edge or wire-like material that has been bent over or pushed out of place.
- What are Burrs? Burrs are usually caused by aggressive cutting, hitting foreign objects, or dulling. They disrupt the clean cutting action.
- How to Spot Them: Look closely at the teeth under good light. You might see a small, irregular edge or a slightly bent tip.
- Addressing Burrs:
- Sharpening: The best way to remove burrs and restore the proper cutting edge is through professional blade sharpening. Sharpening services will not only sharpen the teeth but also ensure they are properly formed and free of burrs.
- DIY (with caution): For very minor burrs and if you have experience, you might be able to gently remove them with a fine grit sharpening stone or a ceramic honing rod. However, this is delicate work and can easily damage the blade if not done correctly. It’s generally safer to leave this to professionals.
A properly deburred and sharpened blade cuts much more cleanly and efficiently.
Tools and Supplies for Blade Cleaning
Having the right tools makes the job easier and more effective.
- Safety Gear:
- Safety Glasses/Goggles
- Chemical-Resistant Gloves
- Respirator (especially for solvent-based cleaners or ammonia)
- Cleaning Agents:
- Commercial saw blade cleaner solutions
- Dish soap, degreaser, ammonia, vinegar, mineral spirits
- Brushes:
- Stiff nylon brush
- Brass brush (good for metal, less likely to damage carbide teeth)
- Old toothbrushes
- Wiping and Drying:
- Clean rags or shop towels
- Paper towels
- Other Tools:
- Bucket or shallow tray for soaking
- Wrench for blade removal
- Compressed air can or compressor
Best Practices for Saw Blade Maintenance
Saw blade maintenance is more than just cleaning. It’s a holistic approach to ensuring your blades last and perform optimally.
- Regular Cleaning: Don’t wait until the blade is visibly gunked up. Clean your blades periodically, especially after cutting resinous woods or adhesives.
- Proper Storage: Store blades in a dry place. Blade cases or racks are ideal. Avoid stacking them loosely, which can cause damage or rust.
- Sharpening: When you notice a decline in cut quality, it’s time for blade sharpening. Dull blades are dangerous and inefficient. Find a reputable sharpening service or consider investing in a good sharpening system if you do a lot of cutting.
- Inspect for Damage: Before and after cleaning, inspect your blades for bent teeth, cracks, or missing teeth. These are signs of a damaged blade that should be replaced.
- Use the Right Blade for the Job: Different materials and cut types require different blade configurations (tooth count, tooth shape, set). Using the wrong blade can lead to premature dulling and poor performance.
- Avoid Cutting Foreign Objects: Try to ensure your lumber is free of nails, staples, screws, or rocks. Hitting these can damage teeth and potentially cause kickback.
Frequently Asked Questions (FAQ)
Q1: How often should I clean my saw blades?
A1: This depends on how much you use them and what materials you cut. If you cut a lot of pine or MDF, you might need to clean them after every few projects. For general use, cleaning every few months or when you notice a decrease in cut quality is a good rule of thumb.
Q2: Can I use my dishwasher to clean saw blades?
A2: It’s generally not recommended. Dishwasher detergents can be very alkaline and might damage the blade coatings or metal. Plus, the high heat and moisture could promote rust if the blades aren’t dried perfectly.
Q3: Is it safe to clean saw blades with flammable solvents like acetone?
A3: Yes, but with extreme caution. Acetone is very effective but highly flammable. Ensure you are in a well-ventilated area, far from any open flames, sparks, or heat sources. Wear appropriate PPE (respirator, gloves, eye protection).
Q4: How do I know if my saw blade needs sharpening?
A4: Signs include increased effort to cut, rough or splintered cuts, excessive heat buildup, burning on the workpiece, and the blade not cutting cleanly.
Q5: Can I sharpen my own saw blades?
A5: Yes, but it requires specialized knowledge, jigs, and grinding wheels. For most woodworkers, it’s more practical and cost-effective to send blades to a professional sharpening service. If you do plan to sharpen yourself, invest in quality equipment and learn the proper techniques.
Q6: What is the best way to prevent rust on my saw blades?
A6: Always dry blades thoroughly immediately after cleaning. Apply a light coat of protective oil (like WD-40 or a silicone spray) after drying. Store blades in a dry environment.
Q7: My carbide-tipped blades have some missing carbide tips. Can I still clean them?
A7: If carbide tips are missing, the blade is likely damaged and unsafe to use. Cleaning won’t fix this. Such blades should be professionally inspected and may need to be discarded or professionally re-tipped if possible. Do not attempt to clean or use a blade with missing carbide tips.
By following these guidelines, you can ensure your saw blades remain sharp, efficient, and safe for all your cutting tasks. Good saw blade maintenance is an investment in both your tools and the quality of your work.