
Can you hang a jigsaw puzzle on the wall? Yes, you absolutely can! Hanging jigsaw puzzles is a fantastic way to transform your completed creations into unique and personalized wall art. It’s a rewarding DIY project that adds a touch of charm and accomplishment to any room. This guide will walk you through everything you need to know about puzzle mounting, puzzle framing, and puzzle display, making your favorite puzzles a permanent part of your decor. We’ll cover essential techniques for puzzle preservation, ensuring your hard work looks great for years to come.
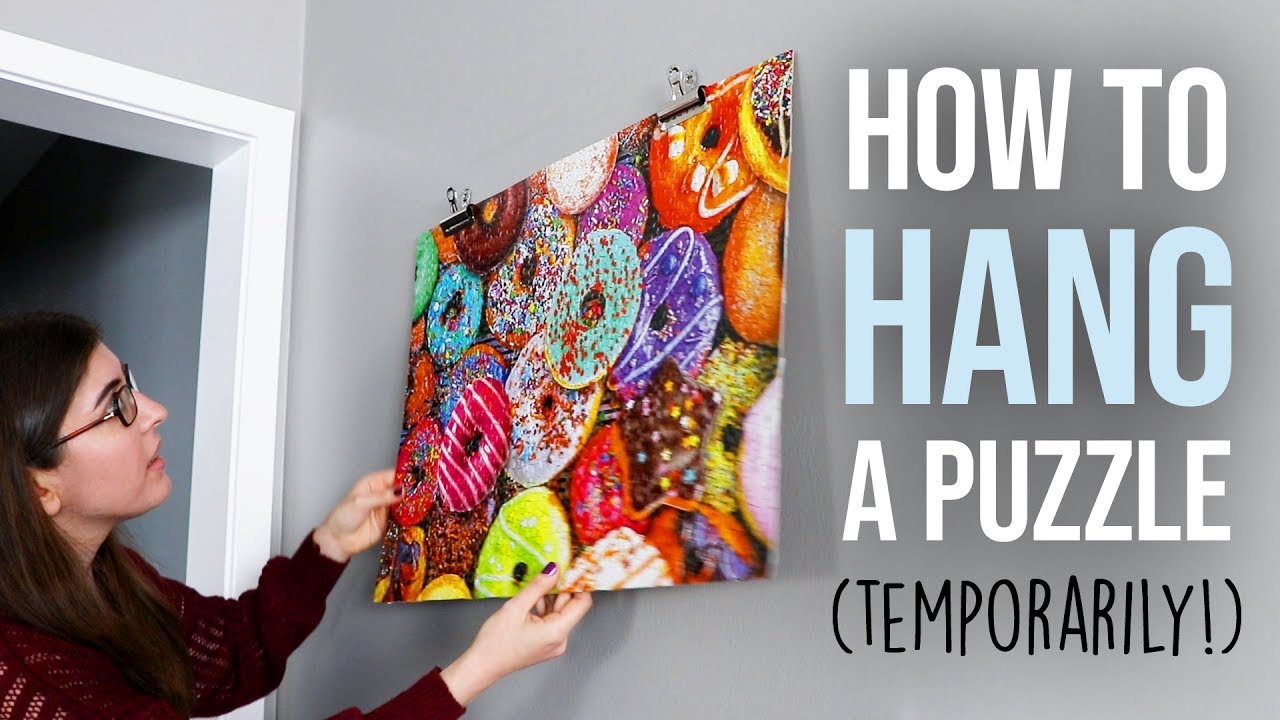
Image Source: i.ytimg.com
The Joy of Puzzle Preservation and Display
Completing a jigsaw puzzle can bring a sense of immense satisfaction. The hundreds, or even thousands, of small pieces finally clicking into place to reveal a beautiful image is a rewarding experience. But what do you do with the finished masterpiece? Simply dismantling it feels like a waste. This is where the art of puzzle mounting and puzzle framing comes in, allowing you to preserve your efforts and showcase them as stunning wall art.
Why Turn Puzzles into Wall Art?
- Personal Touch: Unlike mass-produced art, your puzzle art tells a story – the story of your dedication and enjoyment.
- Cost-Effective Decor: It’s a budget-friendly way to decorate your home with art that is meaningful to you.
- Conversation Starter: Friends and family will admire your creativity and the effort you put into your puzzle art.
- Room Enhancement: A beautifully framed puzzle can add color, texture, and a focal point to any room.
- Sense of Accomplishment: Seeing your completed puzzle on the wall is a constant reminder of your achievement.
Preparing Your Puzzle for Mounting
Before you can even think about hanging your puzzle, proper preparation is key. This involves ensuring the puzzle is perfectly assembled and ready for the next steps.
The Importance of a Solid Foundation
A well-prepared puzzle is crucial for a smooth and successful mounting process. Any gaps or loose pieces can lead to frustration later on.
Ensuring All Pieces are Fully Connected
Take a moment to gently run your hand over the entire surface of the completed puzzle. Ensure all pieces are firmly interlocked. Press down lightly on different sections to confirm there are no wiggly or loose areas. If you find any, carefully push them together until they sit flush.
Cleaning Your Puzzle
Dust and debris can detract from the finished look. You can clean your puzzle in a few ways:
- Soft Brush: A soft-bristled brush (like a makeup brush or a dedicated craft brush) can be used to gently sweep away any loose dust or debris from the surface and between the pieces.
- Lint-Free Cloth: A slightly damp (not wet!) lint-free cloth can be used to wipe down the surface. Be gentle to avoid dislodging any pieces. Ensure the puzzle is completely dry before proceeding.
Choosing Your Puzzle Mounting Method
There are several effective ways to mount a jigsaw puzzle, each offering a slightly different look and level of durability. The best method for you will depend on your preference, the type of puzzle, and your desired final presentation.
Method 1: Using Puzzle Glue and a Mounting Board
This is a popular and reliable method for puzzle preservation, creating a sturdy and permanent display piece.
What You’ll Need:
- Jigsaw Puzzle Glue: Look for glues specifically designed for puzzles. These are usually clear and don’t yellow over time.
- Jigsaw Puzzle Mounting Board: This can be a piece of sturdy cardboard, foam board, or even a thin piece of MDF or plywood. The board should be slightly larger than your puzzle.
- Spatula or Spreader: For evenly distributing the glue.
- Wax Paper or Plastic Wrap: To protect your work surface.
- Scissors or Craft Knife: To trim the mounting board if necessary.
- Optional: Sealer/Varnish: For extra protection and a glossy finish.
Step-by-Step Guide:
- Prepare Your Workspace: Lay down wax paper or plastic wrap on a flat surface. This will protect your table from glue.
- Secure the Puzzle: If your puzzle is not already on a sturdy backing, carefully slide a piece of cardboard or your mounting board underneath it. Ensure it’s centered.
- Apply Puzzle Glue (Front):
- Pour a generous amount of puzzle glue onto the surface of the puzzle.
- Using a spatula or spreader, gently spread the glue evenly across the entire surface, making sure to get it into all the cracks between the pieces. Work in sections if needed.
- Wipe away any excess glue that drips over the edges of the puzzle.
- Let it Dry: Allow the glue to dry completely according to the manufacturer’s instructions. This can take several hours.
- Apply Puzzle Glue (Back – Optional but Recommended):
- Carefully flip the puzzle over. You might need assistance for larger puzzles. Slide a piece of cardboard or another mounting board underneath to support it during the flip.
- Apply puzzle glue to the back of the puzzle, spreading it evenly. This adds significant strength and helps prevent warping.
- Let the back dry completely.
- Attach to Mounting Board:
- If you haven’t already, cut your jigsaw puzzle mounting board to be about 1-2 inches larger than your puzzle on all sides.
- Apply a layer of puzzle adhesive or strong craft glue to the surface of the mounting board.
- Carefully align your glued puzzle onto the mounting board and press down firmly, starting from the center and working outwards to push out any air bubbles.
- Add a Protective Seal (Optional): Once the adhesive is dry, you can apply a clear sealant or varnish over the puzzle surface for extra protection and a professional finish.
Method 2: Using Puzzle Adhesive Sheets
Puzzle adhesive sheets are a convenient, mess-free option for puzzle mounting. They are typically double-sided adhesive sheets that you stick to the back of your puzzle.
What You’ll Need:
- Puzzle Adhesive Sheets: These come in various sizes and are designed to cover the entire back of a puzzle.
- Scissors or Craft Knife: To cut the sheets to size.
- Optional: Jigsaw Puzzle Mounting Board: If you plan to mount it to a backing.
Step-by-Step Guide:
- Prepare Your Workspace: Ensure you have a clean, flat surface.
- Secure the Puzzle: Gently slide a piece of thin cardboard or your chosen mounting board underneath the completed puzzle.
- Apply Adhesive Sheets (Back):
- Carefully peel the backing off one adhesive sheet.
- Align it with a section of the back of your puzzle and press down firmly, smoothing out any air bubbles.
- Continue applying sheets, overlapping them slightly if necessary, until the entire back of the puzzle is covered.
- Attach to Mounting Board (If Desired):
- Peel the protective backing off the adhesive sheets.
- Carefully align the puzzle onto your mounting board and press down firmly to ensure good adhesion.
Method 3: Using a Puzzle Frame Kit
A puzzle frame kit offers a polished and professional look, acting as both a mounting and framing solution.
What You’ll Need:
- Puzzle Frame Kit: These kits typically include a frame, a backing board, and hardware for assembly. Some kits also come with adhesive or a pre-cut mat.
- Puzzle Glue: You’ll likely still need puzzle glue to secure the pieces together before framing.
- Scissors or Craft Knife: For any necessary trimming.
Step-by-Step Guide:
- Glue Your Puzzle: Follow the steps from Method 1 to glue your puzzle securely. Ensure it’s completely dry.
- Assemble the Frame: Follow the instructions provided with your puzzle frame kit. This usually involves placing the puzzle (or the glued puzzle on its mounting board) into the frame, securing the backing, and adding any decorative elements like mats.
- Secure the Puzzle within the Frame: Some kits include adhesive strips or clips to hold the puzzle in place within the frame. Ensure your puzzle is held snugly to prevent shifting.
Advanced Puzzle Finishing Techniques
Once your puzzle is mounted, you might want to add extra touches for enhanced durability and aesthetic appeal.
Applying a Protective Sealer or Varnish
A clear sealer or varnish can protect your puzzle art from dust, moisture, and UV rays, helping to preserve the colors and prevent yellowing.
- Types of Sealers:
- Gloss Varnish: Provides a shiny, reflective finish.
- Matte Varnish: Offers a non-reflective, subtle finish.
- Satin Varnish: A middle ground between gloss and matte.
- Application: Apply thin, even coats using a foam brush or spray can. Allow each coat to dry thoroughly before applying the next, following the product’s instructions.
Adding a Mat Board
A mat board can create a border around your puzzle, giving it a more gallery-like appearance and making it easier to frame if the frame size doesn’t perfectly match the puzzle dimensions.
- Choosing a Mat: Select a mat board that complements the colors in your puzzle.
- Cutting: You can purchase pre-cut mats or cut your own using a mat cutter and a sharp craft knife. Ensure the inner opening of the mat is slightly smaller than your puzzle so the edges of the puzzle are hidden.
- Adhering: Use puzzle adhesive or archival glue to attach the mat to the puzzle or the mounting board.
Mounting Different Types of Puzzles
The methods described above are suitable for most standard jigsaw puzzles. However, there are a few variations to consider.
Mounting Jigsaw Puzzles with Glitter or Special Finishes
- Glitter Puzzles: Be extra careful when gluing and sealing. Use a spray adhesive or a clear spray varnish rather than brushing to avoid smudging the glitter. Apply multiple thin coats.
- 3D Puzzles: These might require specialized adhesives or framing solutions. Some 3D puzzles come with their own display stands or framing options.
Mounting Large or Very Thick Puzzles
- Sturdy Backing: For very large puzzles, use a robust mounting board like thin plywood or MDF.
- Multiple Adhesive Sheets: You might need more adhesive sheets or a stronger adhesive to ensure the entire puzzle is securely attached.
- Assistance: Always get help when flipping or moving large, mounted puzzles.
Displaying Your Puzzle Art
Once your puzzle is mounted and ready, it’s time to find the perfect spot to hang it.
Choosing the Right Location
- Avoid Direct Sunlight: Sunlight can fade the colors of your puzzle over time.
- Consider Humidity: High humidity can be detrimental to the adhesive and the puzzle itself. Avoid bathrooms or kitchens with excessive steam.
- Wall Strength: Ensure the wall you choose can support the weight of your mounted puzzle.
Hanging Your Mounted Puzzle
- Picture Wire and Hooks: The most common method. Attach picture wire to the back of your mounting board or frame, ensuring it’s securely fastened. Use appropriate wall hooks for the weight of your artwork.
- D-Rings and French Cleats: For heavier puzzles, D-rings attached to the sides of the mounting board and a French cleat system on the wall provide very secure mounting.
- Adhesive Strips: For lighter puzzles and temporary displays, heavy-duty adhesive strips can work, but they may not be suitable for long-term puzzle preservation or heavier pieces. Always check the weight capacity.
Troubleshooting Common Issues
Even with careful preparation, you might encounter a few snags.
Air Bubbles
- During Gluing: Work slowly and use your spreader to push air out as you go.
- After Gluing: If you notice a small bubble under the surface after drying, you might be able to carefully prick it with a fine needle and gently press the air out.
Puzzle Warping
- Cause: Uneven drying, excessive moisture, or not enough support on the back.
- Prevention: Ensure the puzzle is completely dry before flipping. Use a sturdy mounting board and consider gluing the back for extra rigidity.
Glue Residue
- On the Surface: Try to wipe away excess glue while it’s still wet with a damp cloth. If dry, you might be able to gently scrape it off with a craft knife at a very low angle, but be extremely careful not to damage the puzzle image.
Frequently Asked Questions (FAQ)
Q: What is the best puzzle glue to use?
A: Look for glues specifically labeled for jigsaw puzzles. Brands like Mod Podge, MasterPieces Puzzle Glue, or Ravensburger Puzzle Conserver are popular and effective choices.
Q: Can I use regular craft glue to mount my puzzle?
A: While some craft glues might work, they can sometimes yellow over time or not provide a strong enough bond for long-term puzzle preservation. Puzzle-specific glues are formulated to dry clear and remain flexible.
Q: How long does puzzle glue take to dry?
A: Drying times vary by brand and thickness of application, but typically range from 1 to 4 hours for a surface coat and much longer, often overnight, for a full cure, especially if gluing the back. Always check the product’s instructions.
Q: Can I hang my puzzle without framing it?
A: Yes, you can mount your puzzle on a jigsaw puzzle mounting board and hang it as is, or add a simple border. However, framing adds protection and a more finished look.
Q: How do I store puzzles I haven’t completed yet?
A: Store completed puzzles in their original boxes, in a cool, dry place. If you have a puzzle in progress, ensure it’s on a flat surface and covered to prevent dust and pet interference. Puzzle storage boxes designed for in-progress puzzles are also available.
Q: How do I clean a mounted puzzle?
A: Use a soft, dry dusting cloth or a very slightly damp cloth for gentle cleaning. Avoid harsh chemicals or excessive moisture.
By following these detailed steps, you can transform your completed jigsaw puzzles into beautiful, lasting pieces of art that you’ll be proud to display in your home. Enjoy the process and the impressive results!